Playing Ultrasonic sensor with Arduino
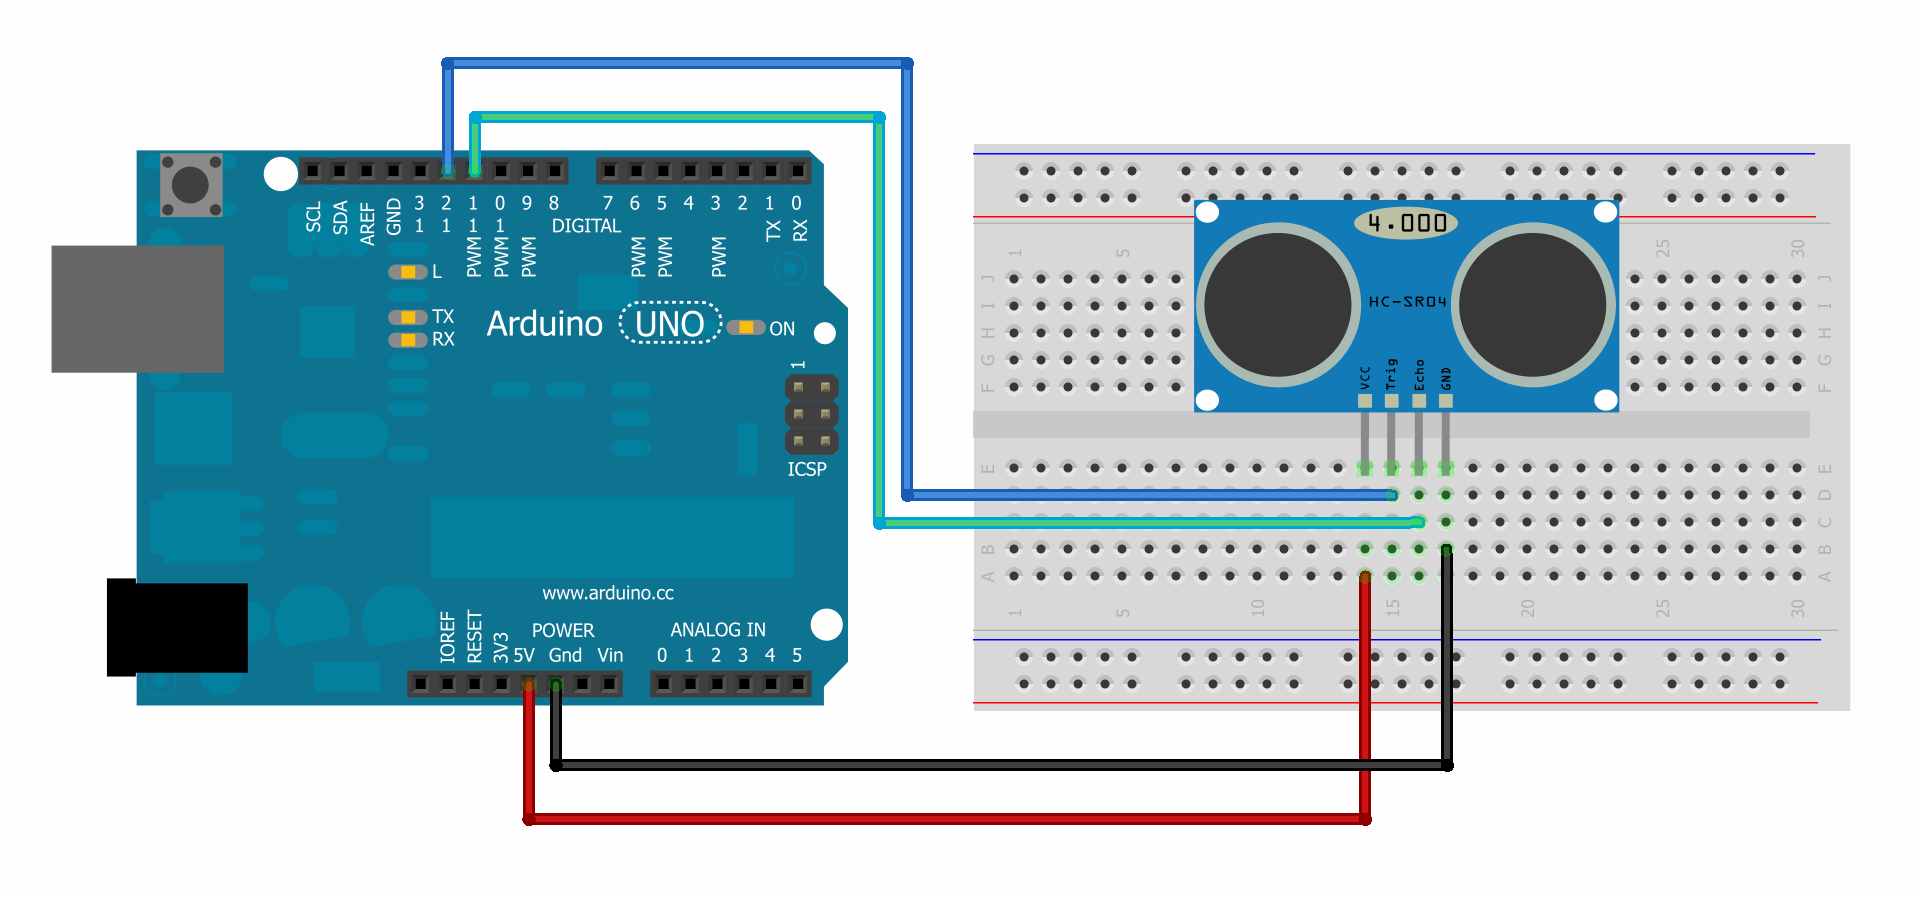
1. The Connection
2. The script
#define echopin 3
#define TRIGPIN 2
void setup()
{
Serial.begin (9600);
pinMode (echopin,INPUT);
pinMode (TRIGPIN, OUTPUT);
}
void loop()
{ digitalWrite(TRIGPIN,LOW);
delayMicroseconds(2);
digitalWrite(TRIGPIN,HIGH);
delayMicroseconds(10);
digitalWrite(TRIGPIN,LOW);
float distance = pulseIn(echopin,HIGH);
distance = distance/46;
Serial.print (distance);
Serial.println (" cm");
if (distance < 10)
{
Serial.print("AWAS HATI-HATI");
Serial.println (" Jarak kurang dari 10 cm");
}
else if
(distance < 20)
{
Serial.print("Waspada");
Serial.println (" Jarak kurang dari 20 cm");
}
else
{
Serial.println ("Jarak Masih Aman");
}
delay (200);
}

